
In recent times, the use of WSL (Windows Subsystem for Linux) has been raising in popularity. I see more developers replacing other virtualization solutions in favor of WSL. In such case you might need a way to create and maintain multiple WSL Instances with different Software Stack, Installations and versions. This Guide will show you how to manage several WSL Instances.
First Lets take a look at what we currently have. If you installed WSL from the Application Store, you will likely have just 1 WSL Instance Called Ubuntu Default.
PS C:\Users\Robert> wsl --list

Windows Subsystem for Linux Distributions:

Ubuntu-22.04 (Default)
Check out and Install Windows Terminal
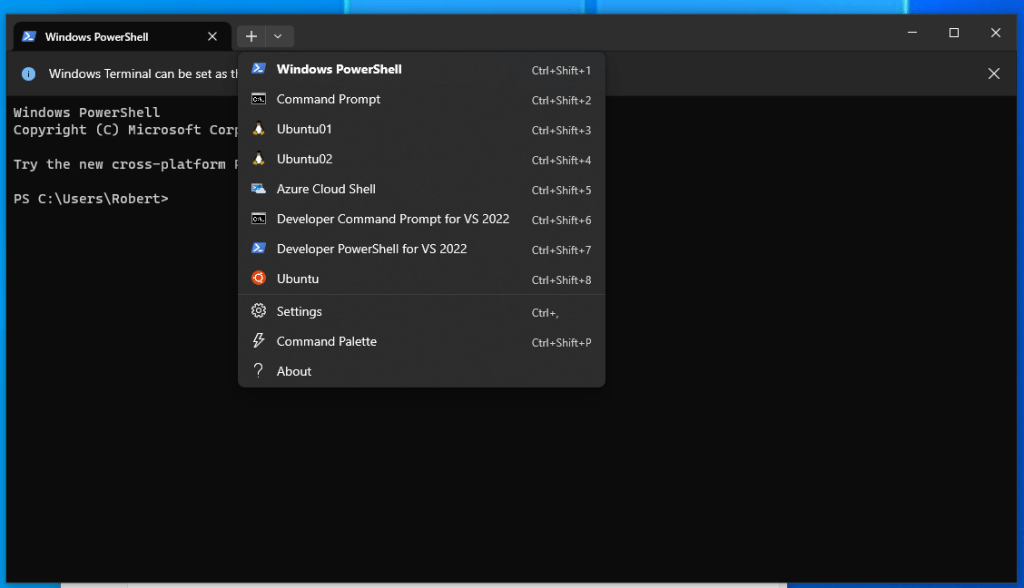
Before we move forward I highly recommend you to Install and Checkout Windows Terminal. Its the best Terminal Emulator I have found for Windows so far and it has native ability to Login and Select Directly Which WSL VM you want to login directly.
Backup your existing WSL Ubuntu Image
You likely already had work on your WSL reason you will likely want to perform a backup. You can later use this backup, or a fresh image to create your new instances of WSL. I created a WSL folder to manage my wsl images inside Documents. It will make it easier to manage and backup later.
PS C:\Users\Robert\wsl> wsl --export Ubuntu-22.04 wsl-original-ubuntu

Export in progress, this may take a few minutes.

The operation completed successfully.
I unregister the original VM, Since I want to rename it differently and reimport them as two separate instances.
PS C:\Users\Robert\wsl> wsl --unregister Ubuntu-22.04

Unregistering.

The operation completed successfully.


PS C:\Users\Robert\wsl> wsl --import Ubuntu01 Ubuntu01 .\wsl-original-ubuntu

Import in progress, this may take a few minutes.

The operation completed successfully.


PS C:\Users\Robert\wsl> wsl --import Ubuntu02 Ubuntu02 .\wsl-original-ubuntu

Import in progress, this may take a few minutes.

The operation completed successfully.
In the Previous command:
- Ubuntu01 (First Parameter) Refer to the Name of the VM
- Ubuntu01 (Second Parameter) Refer to the Folder where the VM will be stored
- wsl-original-ubuntu Refer to the Image of WSL that we exported previously.
Your folder should look a little bit like this.
PS C:\Users\Robert> wsl --list

Windows Subsystem for Linux Distributions:

Ubuntu01 (Default)

Ubuntu02
PS C:\Users\Robert\wsl> dir
Directory: C:\Users\Robert\wsl
Mode LastWriteTime Length Name
---- ------------- ------ ----
d----- 13/02/2024 21:01 Ubuntu01
d----- 13/02/2024 21:01 Ubuntu02
-a---- 13/02/2024 21:00 1045022720 wsl-original-ubuntu
PS C:\Users\Robert\wsl>
The Integration with Windows is a bit intriguing. If you click in one of the Folders you will be able to see a funny mounted ext4 file. You cannot click through it, since its mounted but it gives you an idea of the size of your WSL instance.

Your two WSL images should also show up under your Computer, and be able to look into the folder data.

Login to your new Ubuntu WSL Image
If you installed Windows Terminal on the previous step it should very easy now to login to both your WSL Images. You can click on them on the top panel.

If you made it this far, thank you for reading.

Leave a comment